a complete cruise ship on your website in under 3 seconds
12 april 2017
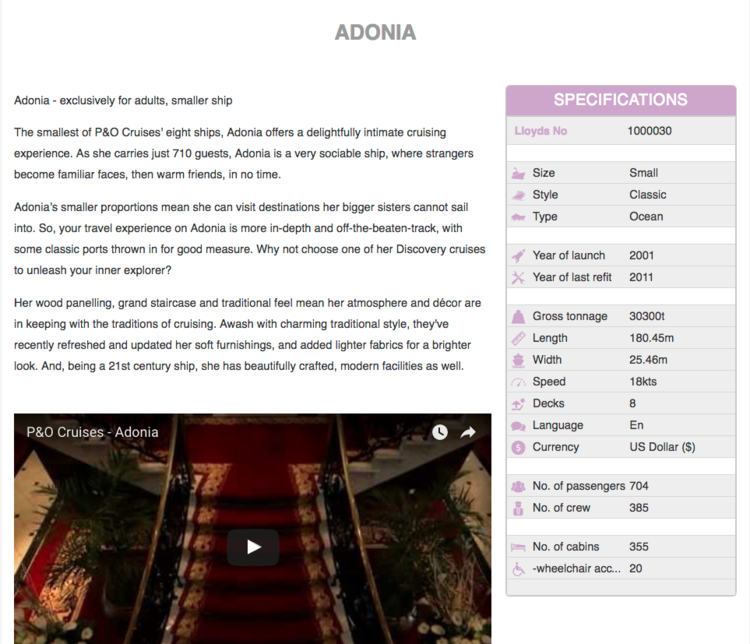
With an increasing number of Travel Agents embedding our Ship iFrames onto their websites, we’ve released some new features. You can find them in the customisation section of the Widget Factory.
OPTIMISE YOUR SHIP IFRAMES FOR YOU WEBSITE
Using the new EXPECTED WIDTH field will allow you to optimise the images in your Ship iFrames, so they are exactly the right size for the area they’ll be showing on your website.
To use this new feature, simply enter the expected width in pixel of the area your Ship iFrame will be embedded on. This number will allow the system to calculate the perfect width of all the images in the iFrame, which will then create a specific version of each image at this correct width.
The Ship iFrame will load much faster than before, because it will no longer be loading images bigger than necessary.
SAVE TIME DURING CREATION: APPLY A THEME TO YOUR SHIP IFRAMES
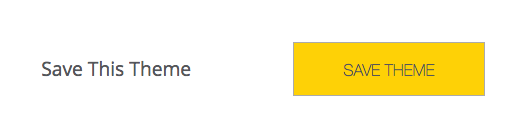
After you’ve created your first Ship iFrame, you have the option to save your design as a theme. The button is available in the ‘Preview your Widget’ step, at the bottom of the EMBED tab.
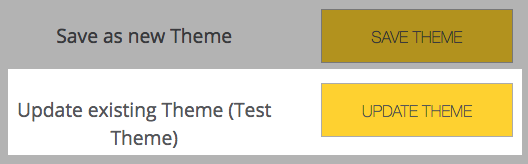
Once you’ve saved a theme, it will be available to apply to any future Ship iFrame you create in the same layout (ie DEFAULT or COLLAPSED), saving you time during the creation process.
Should you wish to make a change to your theme, simply edit one of the Ship iFrames currently using it, make the required changes in the Customisation step, and select UPDATE THEME in the EMBED tab of the ‘Preview your Widget’ step. This will apply the changes you’ve just made to all the other Ship iFrames that are currently using it.
MAKE IT YOURS: REPLACE THE INTRODUCTION AND VIDEO WITH YOUR OWN
We understand that each Travel Agent might want to express their own opinion on a specific ship, or feature their agency’s video of a specific ship or brand. That’s why you can now replace the Introduction and the video with your own, right from the Customisation step.
To do so, simply click on the tooltips on the Introduction, or the Video, and replace the content in the text field with your own copy, or video URL. For more information, please read the last two sections of this support article.
NEW SHOW AND HIDE OPTIONS
You can now choose to hide any of the following:
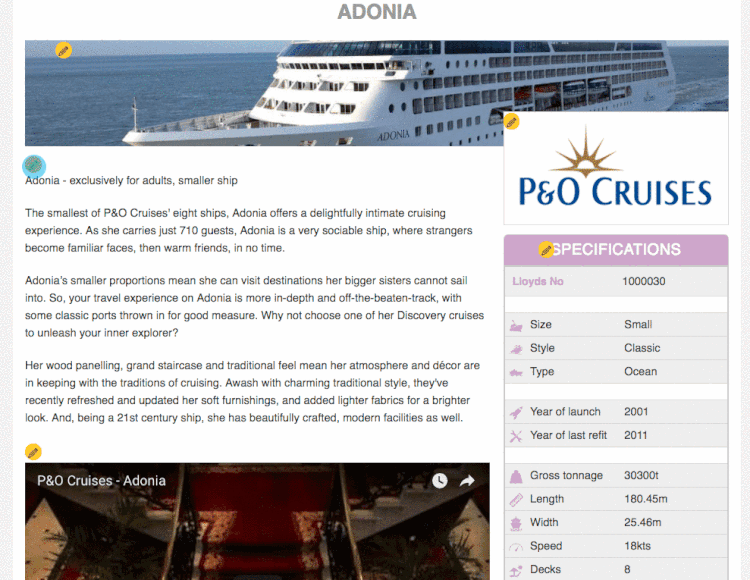
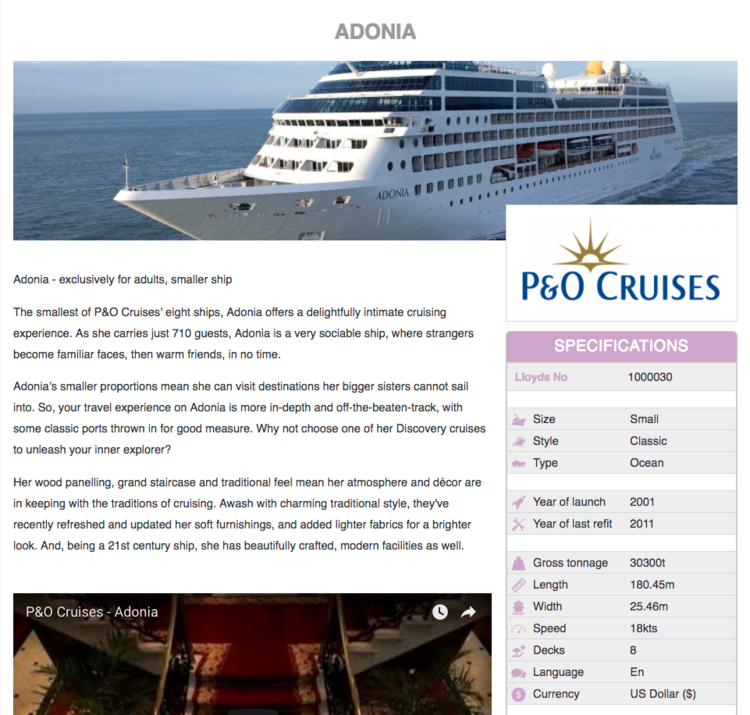
Ship Name
Cover Image
Logo
Introduction
Video
The layout will shift around as you hide elements, so as not to leave in any blank spaces where the elements used to be. For more details, please read the first section of this support article.
We use cookies on our website to give you the most relevant experience by remembering your preferences and repeat visits. By clicking “Accept All”, you consent to the use of these cookies.
This website uses cookies to improve your experience while you navigate through the website. Out of these, the cookies that are categorized as necessary are stored on your browser as they are essential for the working of basic functionalities of the website. We also use third-party cookies that help us analyze and understand how you use this website. These cookies will be stored in your browser only with your consent. You also have the option to opt-out of these cookies. But opting out of some of these cookies may affect your browsing experience.
Necessary cookies are absolutely essential for the website to function properly. These cookies ensure basic functionalities and security features of the website, anonymously.
Cookie
Duration
Description
cookielawinfo-checkbox-analytics
11 months
This cookie is set by GDPR Cookie Consent plugin. The cookie is used to store the user consent for the cookies in the category "Analytics".
cookielawinfo-checkbox-functional
11 months
The cookie is set by GDPR cookie consent to record the user consent for the cookies in the category "Functional".
cookielawinfo-checkbox-necessary
11 months
This cookie is set by GDPR Cookie Consent plugin. The cookies is used to store the user consent for the cookies in the category "Necessary".
cookielawinfo-checkbox-others
11 months
This cookie is set by GDPR Cookie Consent plugin. The cookie is used to store the user consent for the cookies in the category "Other.
cookielawinfo-checkbox-performance
11 months
This cookie is set by GDPR Cookie Consent plugin. The cookie is used to store the user consent for the cookies in the category "Performance".
viewed_cookie_policy
11 months
The cookie is set by the GDPR Cookie Consent plugin and is used to store whether or not user has consented to the use of cookies. It does not store any personal data.
Functional cookies help to perform certain functionalities like sharing the content of the website on social media platforms, collect feedbacks, and other third-party features.
Performance cookies are used to understand and analyze the key performance indexes of the website which helps in delivering a better user experience for the visitors.
Analytical cookies are used to understand how visitors interact with the website. These cookies help provide information on metrics the number of visitors, bounce rate, traffic source, etc.
Advertisement cookies are used to provide visitors with relevant ads and marketing campaigns. These cookies track visitors across websites and collect information to provide customized ads.